How to Create and Manage Private Headcount
Last updated: July 27, 2026
This article walks through creating a private headcount request, setting up the private approval workflow, and managing confidentiality through the hiring process. It is for Admins and for users with the Mark as private permission.
Prerequisites
The requesting user must have the Mark as private permission, enabled by an Admin on the User Roles settings page
Please be sure to configure a private approval workflow before any private requests can be submitted – or private requests will be routed to your system’s default approver(s)
Set up the private approval workflow
Private headcount uses its own approval workflow, separate from your public workflows. Like public workflows, private approvers can be configured using conditions such as department, division, location, etc. The private workflow applies to new private headcount requests and to change requests on approved private headcount.
Important: Keep the private approval chain as small as possible — every approver gains visibility into the confidential role. An approver can see the request once it is their turn to approve, and is added as a collaborator once they approve.

How to create a private headcount request
Create a new headcount or backfill request as you normally would.
Just before submitting the request for approval, enable the Mark as private toggle. The toggle is available on both new hire and backfill requests.
Submit the request. It routes through the private approval workflow.

How to change privacy on an existing headcount
Approved headcount: users with the Mark as private permission can mark an already-approved headcount as private after it has been added to the hiring plan. This will lock visibility down to the same users - creator/requestor, reporting manager, recruiter, and any user listed as a collaborator.
Pending headcount: a public request can be changed to private while it is pending approval. This resets the approval process and sends the request through the private approval workflow from the beginning.
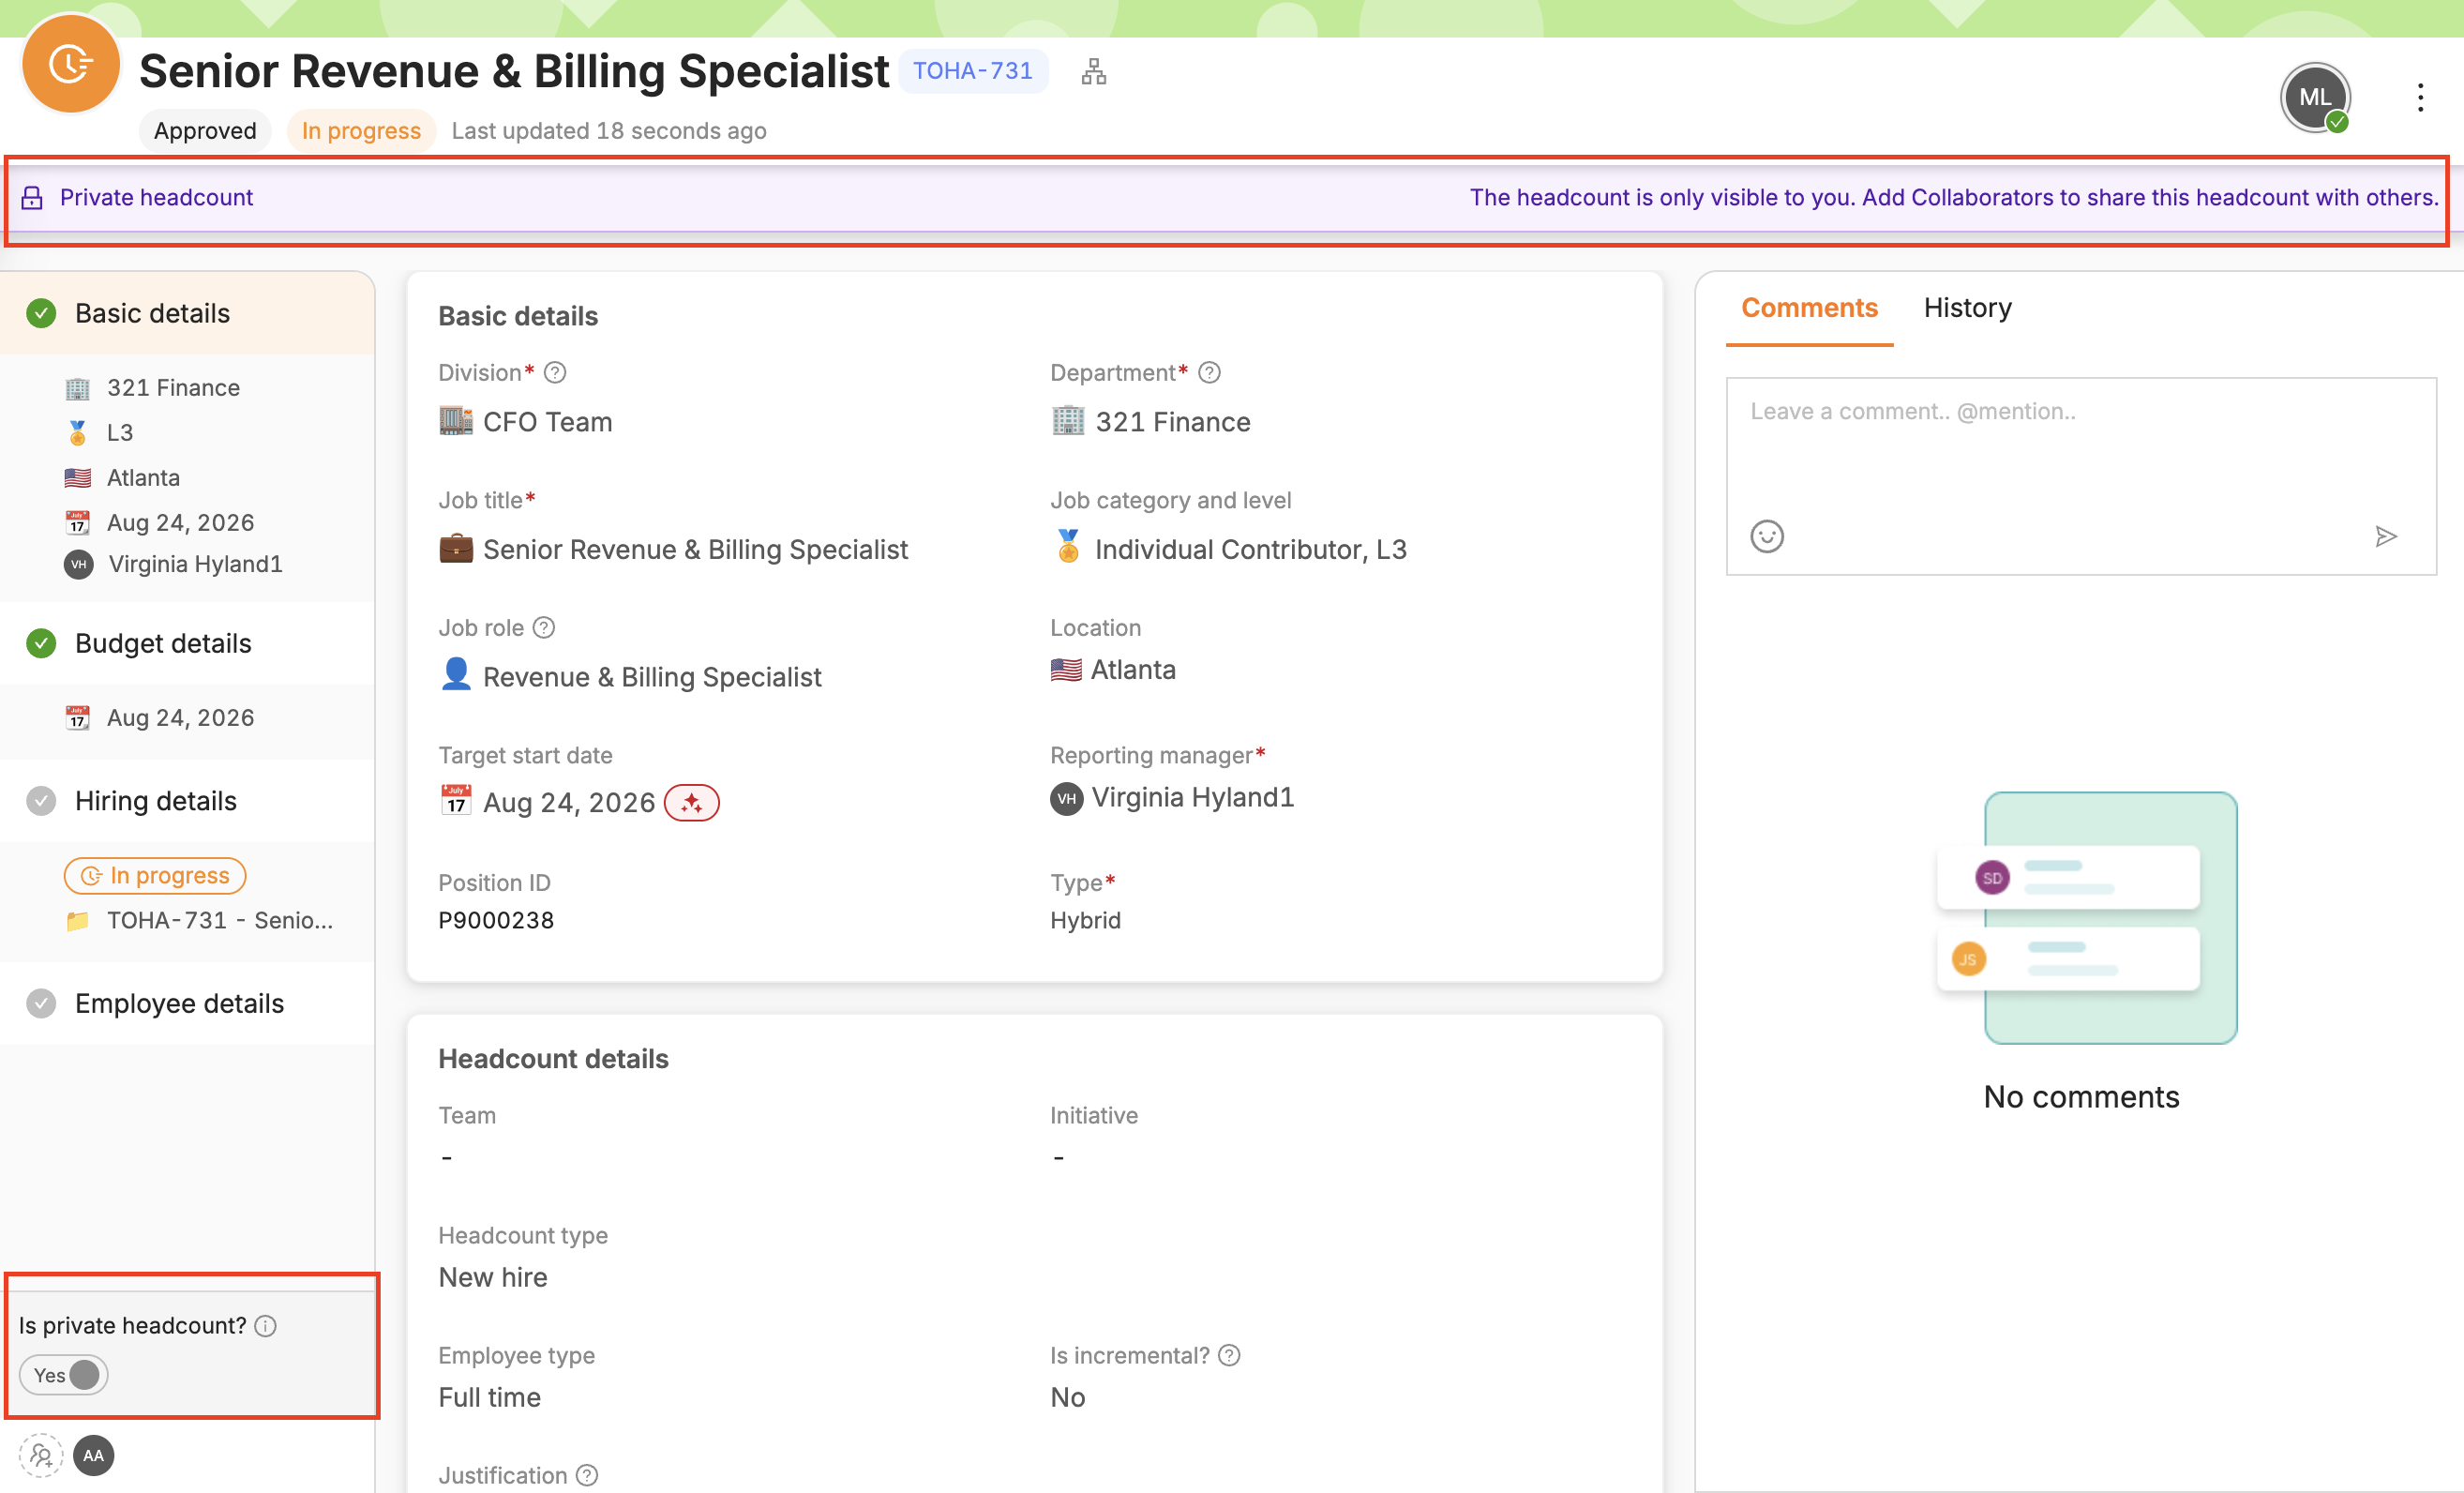
Add collaborators
The requestor can invite others to access the role by adding them as collaborators on the headcount. Collaborators, the reporting manager, and linked recruiters can all view the private headcount. If you @mention a user who does not yet have access, you will be prompted to add them as a collaborator before your comment can post.
Link to confidential jobs in your ATS
When a confidential job and/or opening is created in your ATS to recruit for a private headcount, any user with access to the private headcount in TeamOhana can view and link the confidential role.
How visibility works when linking:
Users with access to the private headcount see both private and public ATS jobs in the link dropdown.
Users without access see only non-private jobs. For example, a recruiter who is not assigned to a confidential CEO search will not see that confidential job when linking their other headcount.
Assigning a recruiter to the private headcount grants them the same linking visibility.
Note: Private headcount can be linked to both public and private ATS jobs, but private ATS jobs are only available to link to private headcount. TeamOhana does not currently support creating private ATS jobs through the Create job in ATS workflow.

Best practices
Restrict the Mark as private permission to a small set of roles (typically Admin, Finance, HR/People Ops leadership).
Configure the private approval workflow before you need it.
Add only essential collaborators, and audit the collaborator list before recruiting begins.
Create the confidential job in your ATS so you can control visibility from ATS before linking it a private headcount in TeamOhana.
Remember the headcount stays private until after the new hire's start date — plan any internal announcement accordingly.
Related Resources
See also the companion article: Private Headcount Overview.