Notification Preferences
Last updated: August 19, 2026
Notification Preferences lets you control who receives each TeamOhana notification and how it reaches them. This article is for users with the Admin role.
Notification rules used to be managed through a spreadsheet upload and a support request. You can now configure them yourself in the platform, and changes take effect immediately.
Prerequisites
Admin role
For Slack delivery, your organization's Slack integration must be connected
How Recipient Rules Work
Each notification in TeamOhana has its own recipient list, built from three types of rules:
Actor — a user connected to the workflow that triggered the notification, identified by their relationship to the headcount rather than by name. Approver, owner, reporting manager, and collaborator are all actors. Actor rules stay accurate as ownership changes, because they resolve at the moment the notification fires.
User Role — everyone assigned a given role, such as Finance or Recruiter.
Specific user — one named person, regardless of their role or involvement.
You can use any of the three to add recipients or to exclude them. Excluding by actor is the piece that was not possible in the old spreadsheet workflow: you can now suppress a notification for the person who took the action while still sending it to everyone else on the list.
Note: Exclusions take precedence over inclusions. If a user is added by role and excluded as a specific user, they do not receive the notification. [VERIFY: Confirm exclusion precedence with Product before publishing.]
Steps
Open Notification Preferences
Navigate to Settings > Notification Preferences.
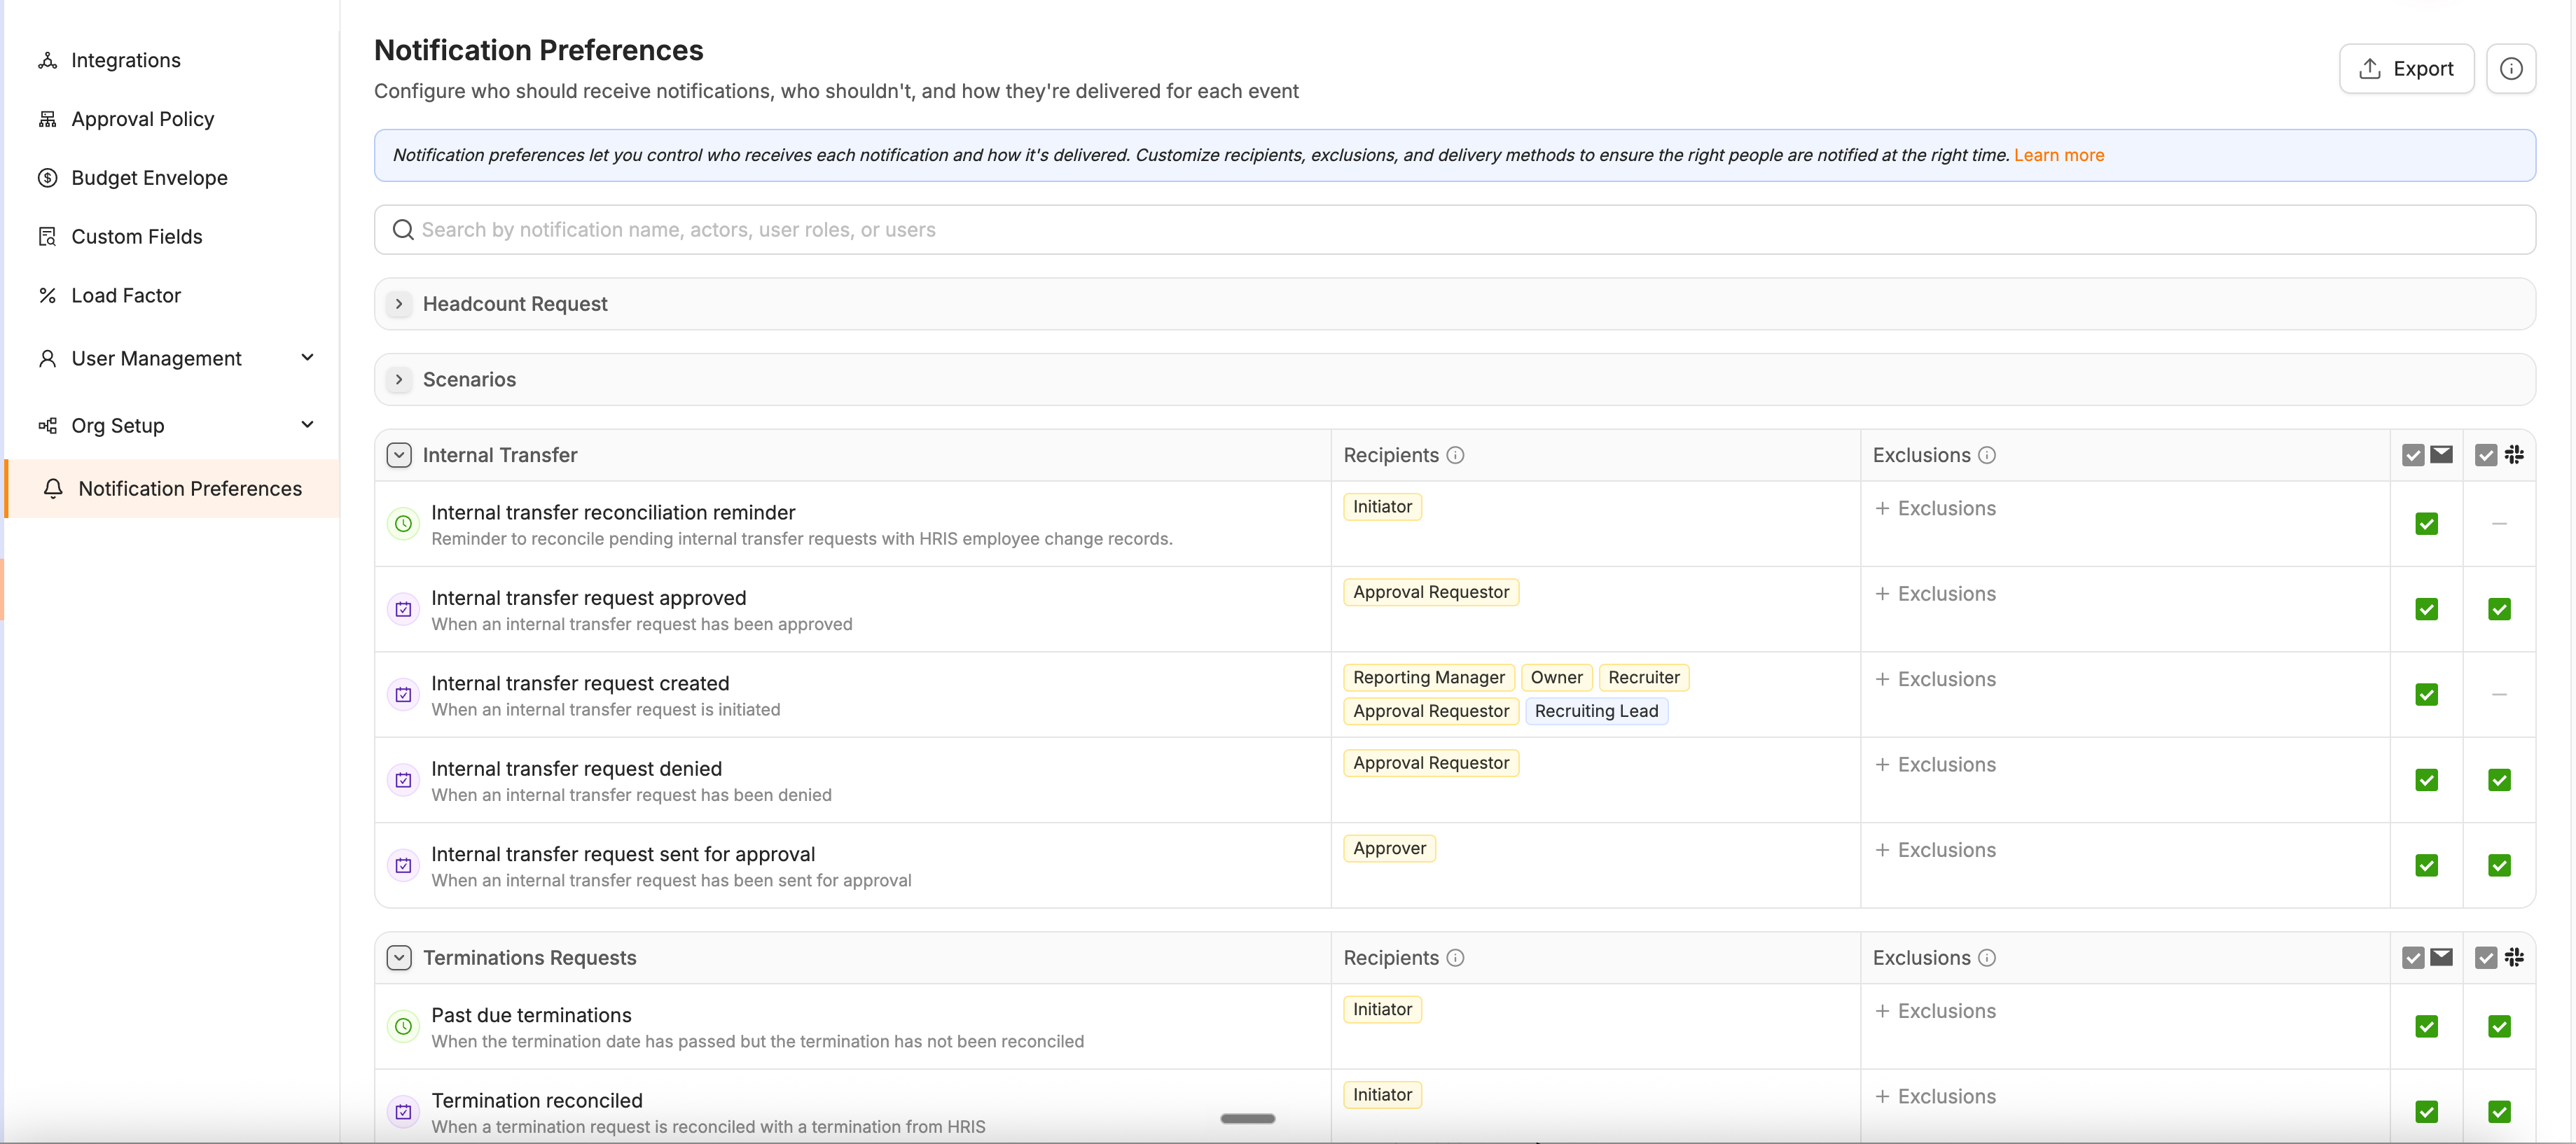
Locate the notification you want to change. Notifications are grouped by workflow — Headcount request, Scenarios, Internal Transfer, Terminations, Position Management, and User Requests.
Add Recipients
Select the notification you want to edit.
Under the recipient list, choose the recipient you want to add or remove
Choose whether you are adding an Actor, a Role, or a Specific user.
Select the actor type, role, or user you want to add. Adding by actor or role is usually the better choice — those rules keep working as people move between teams, while a named user has to be updated by hand.
Save your changes.
Exclude Recipients
On the same notification, choose Exclusions.
Select the actor, role, or specific user to exclude.
Exclusions are useful when a broad rule catches someone it should not. If a notification goes to the Finance role but one Finance partner does not work on headcount, exclude that user rather than rebuilding the rule around individual names.
Tip: Excluding the acting user is a common way to cut notification noise. Someone who just approved a headcount rarely needs an email telling them it was approved.
Choose Delivery Methods
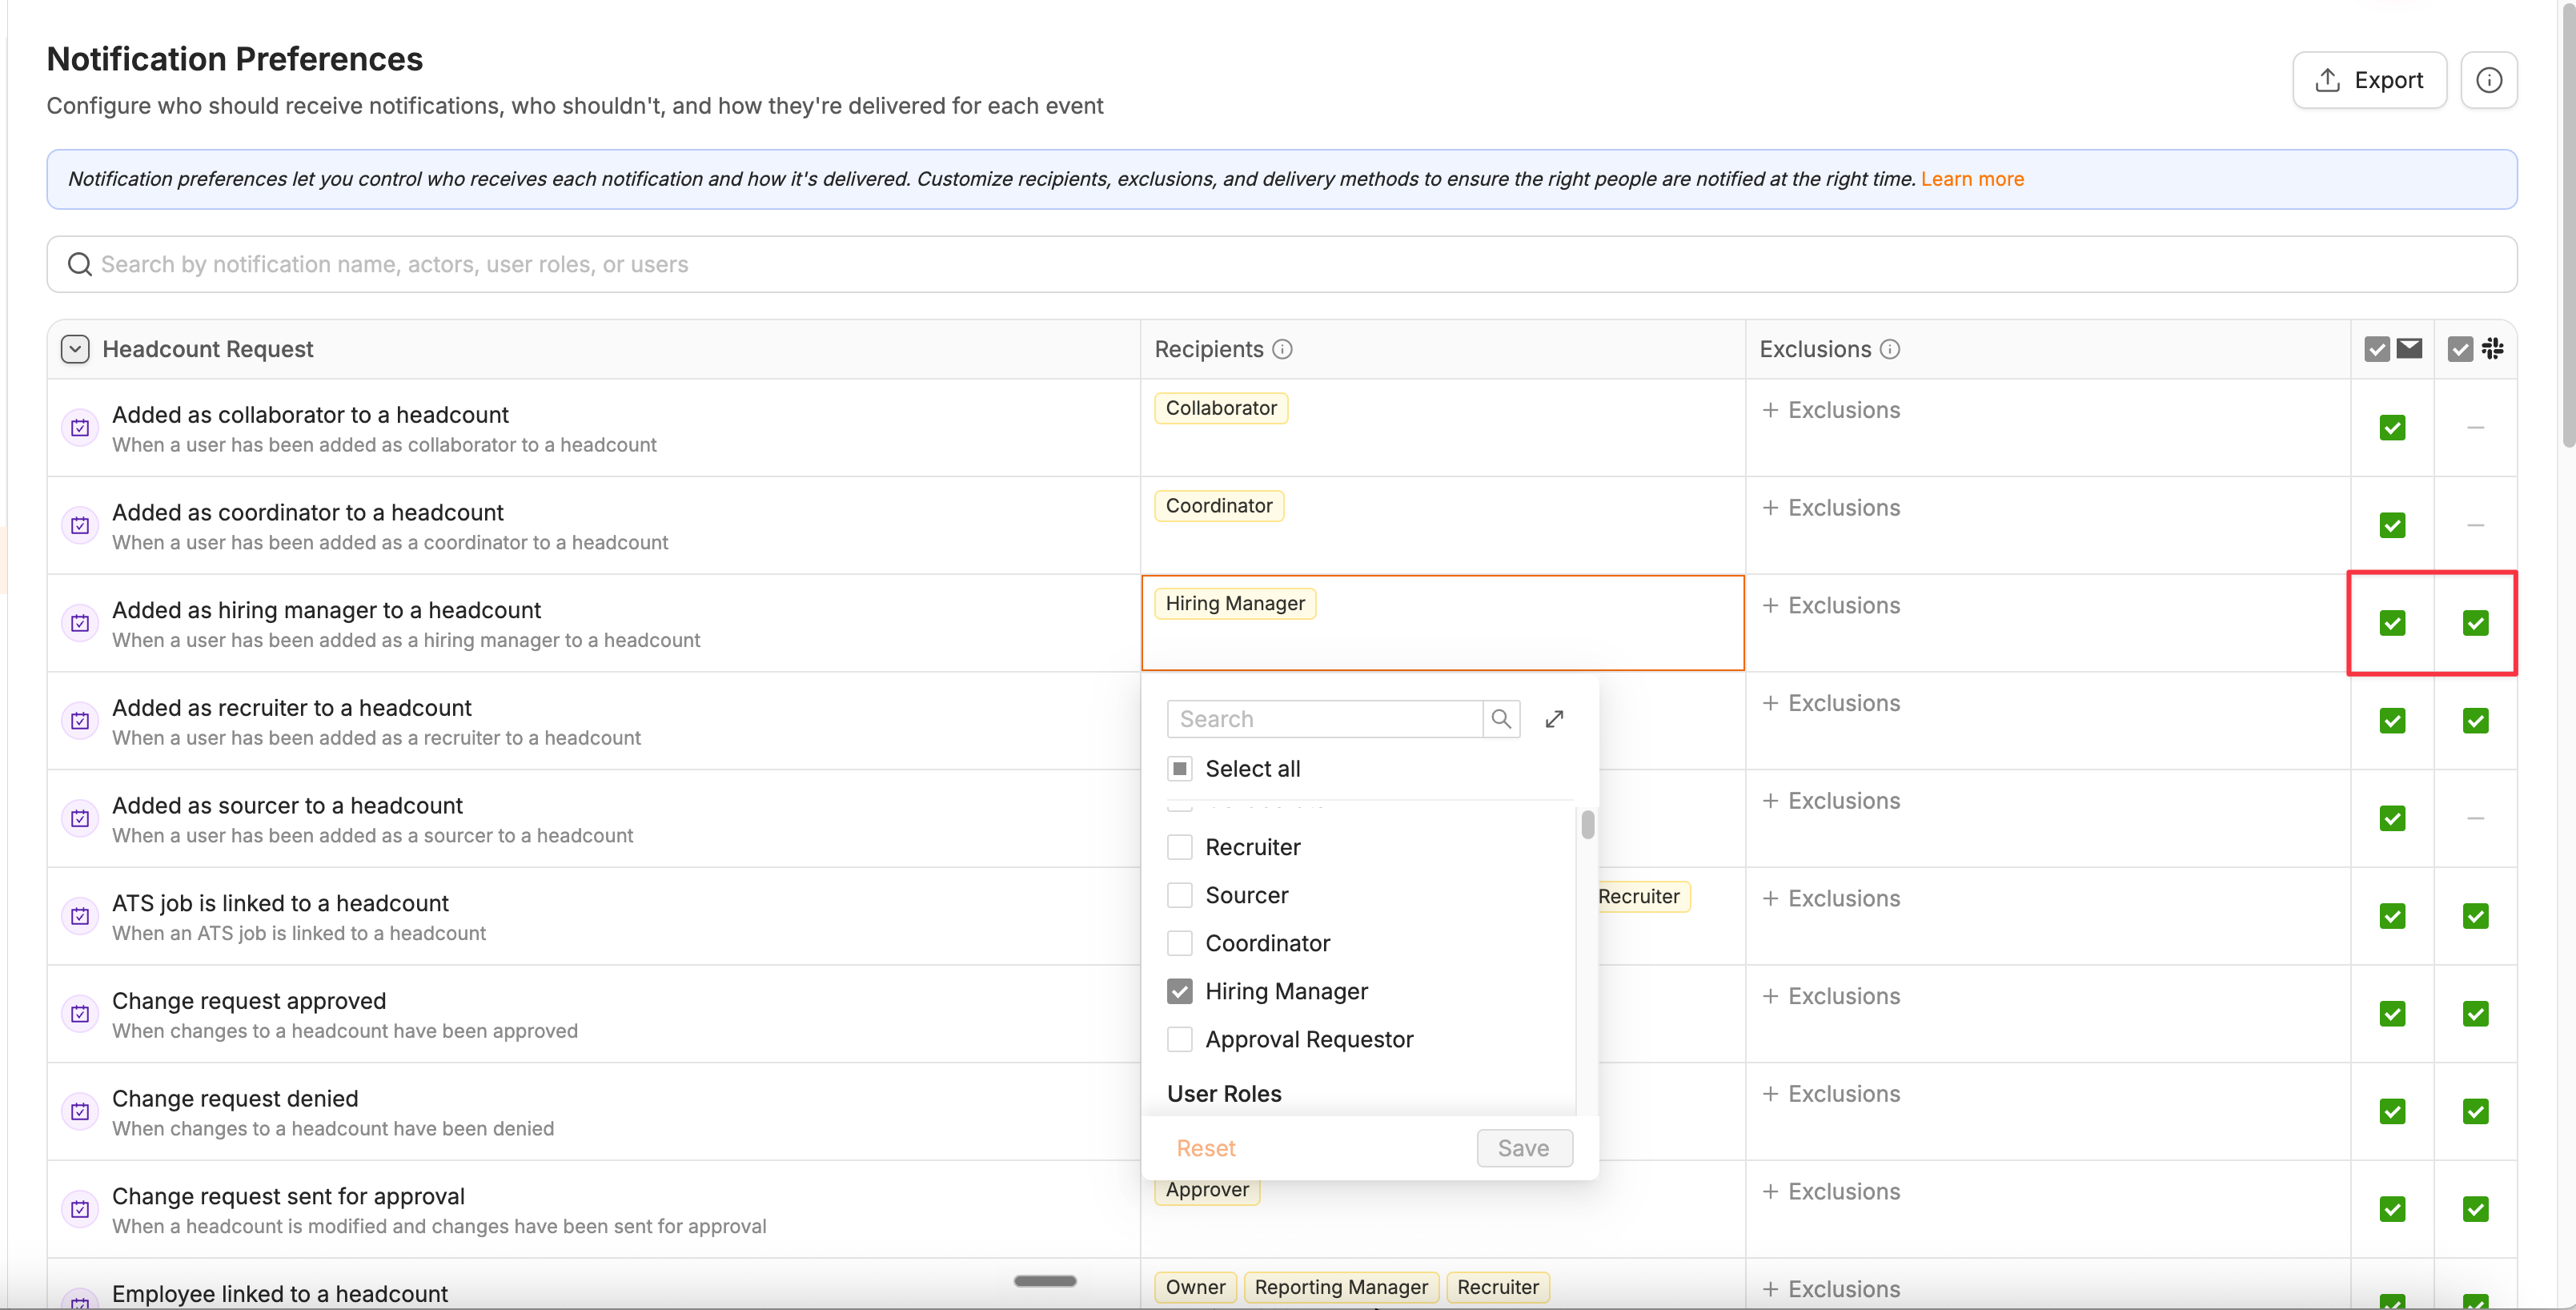
On the notification, toggle each delivery method (email or Slack) on or off.
Delivery methods are set per notification, so you can route high-urgency items such as pending approvals to Slack while leaving lower-priority updates on email only.
Deactivate a Notification
Locate the notification you want to stop sending.
Toggle both email and Slack notification preferences off.
Important: Deactivating a notification stops it for everyone in your organization, not just for you. Confirm no team relies on it before turning it off. Your recipient rules are preserved, so reactivating restores the same configuration.
Edit Multiple Notifications at Once
When the same change applies across several notifications, use bulk edit rather than repeating the work.
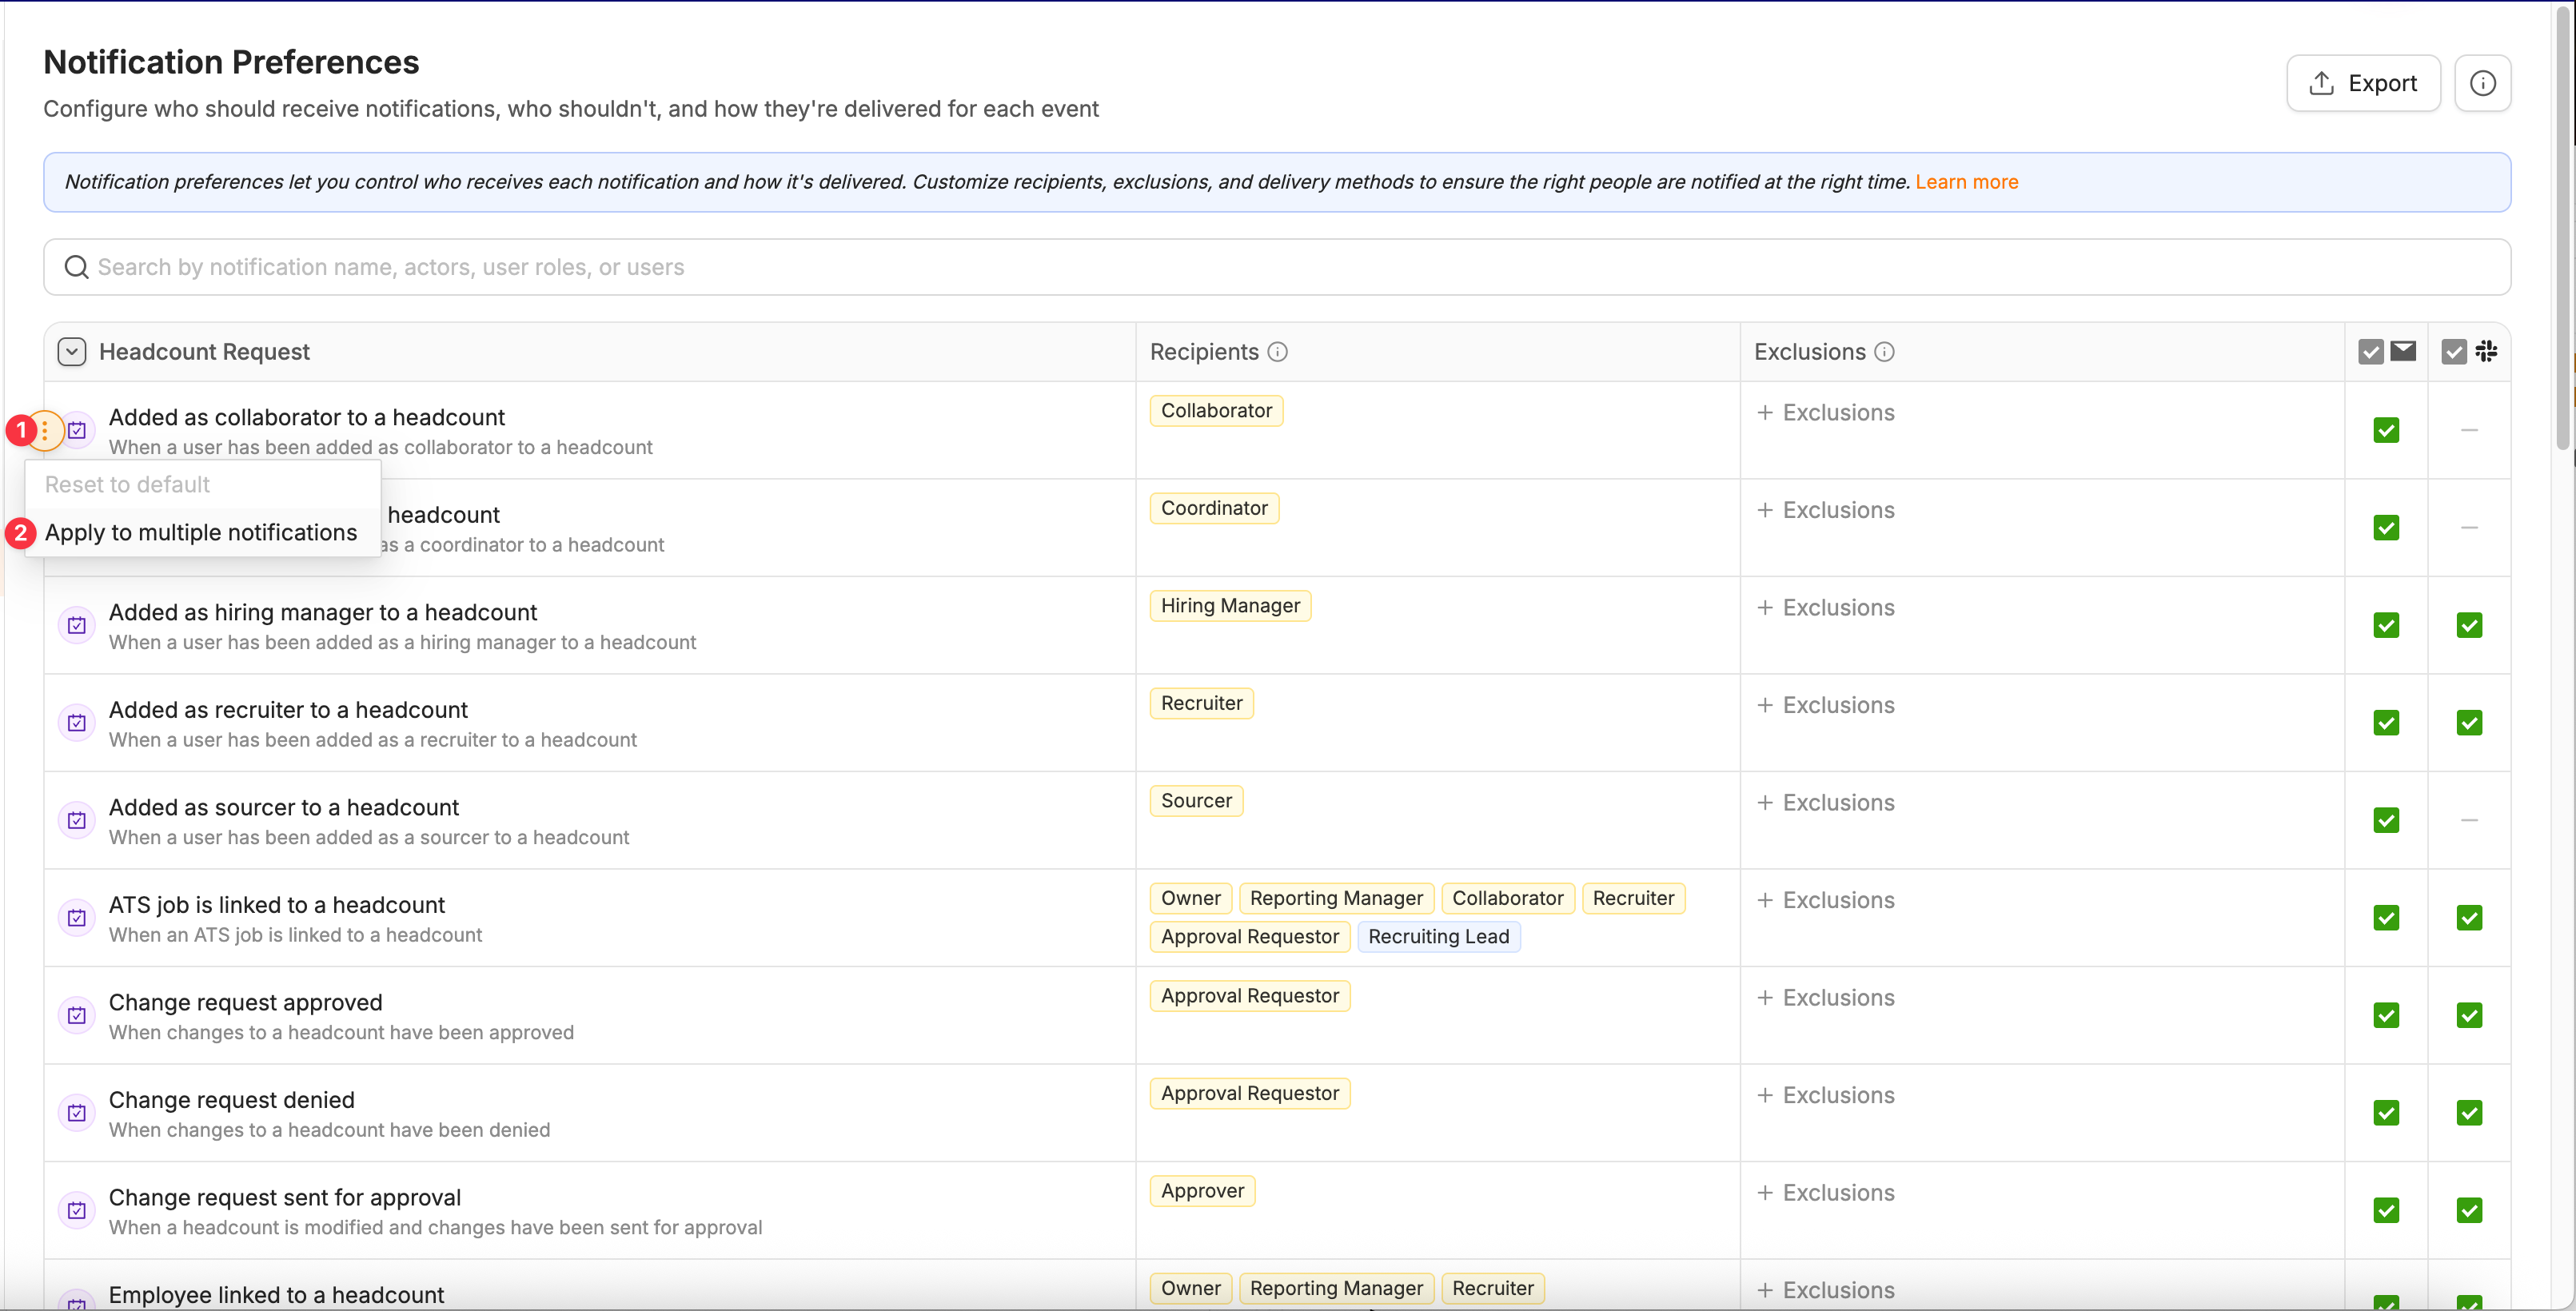
Select the notification preference you want to duplicate.
Apply the recipient, delivery method, or activation change to the full selection.
Bulk edit is the fastest way to handle organization-wide changes, such as excluding a departing team member from every notification or switching a group of notifications to Slack.
What Happens Next
Changes apply to notifications generated after you save. Notifications already sent are not affected, and there is no retroactive delivery to a recipient you just added.
Recipients see the change on the next matching event — the next approval request, status change, or hiring milestone that fires the notification you edited.
Note: Users cannot override organization-level notification settings individually. If someone reports receiving too many notifications, or not receiving one they expect, the fix is made here in Settings > Notification Preferences.