Inviting and Managing Users
Last updated: August 20, 2026
Overview
User management controls who can access TeamOhana and what each person sees once they are in. Adding a user is a two-part job: you assign a role, which determines what actions someone can take, and you set access attributes on their profile, which determine which slice of the organization those actions apply to. This article covers inviting users, setting their access, updating profiles, and deactivating accounts.
This is for users with the Invite users or Manage users permission, typically Admins and HR/People Ops.
Prerequisites
The Invite users permission to send invitations, or Manage users to also edit profiles, mute notifications, and deactivate accounts
An HRIS integration, if you want to select users from your employee roster instead of typing email addresses
Important: Every approver in your approval policy must exist as a user in TeamOhana before they can approve anything. If a headcount request stalls with no visible approver, an unadded user is usually the cause.
How roles and access attributes work together
Two separate settings decide what a user can do.
The role defines the set of actions available to that person: requesting headcount, approving requests, viewing compensation, accessing the Recruiting Workboard, and so on. TeamOhana ships with pre-built roles including Admin, Finance, HR, Recruiting Lead, and Department Head.
The access attributes on the user's profile define the scope those actions apply to: which departments, job levels, locations, and job roles the person can see. A Hiring Manager role with access to one department can only request headcount for that department.
Neither setting works without the other. A user with broad role permissions and no department access sees an empty platform.
Note: Department selections on the user profile override the role-level "Own Department" setting. When the two disagree, the profile wins.
Steps
1. Open User Management
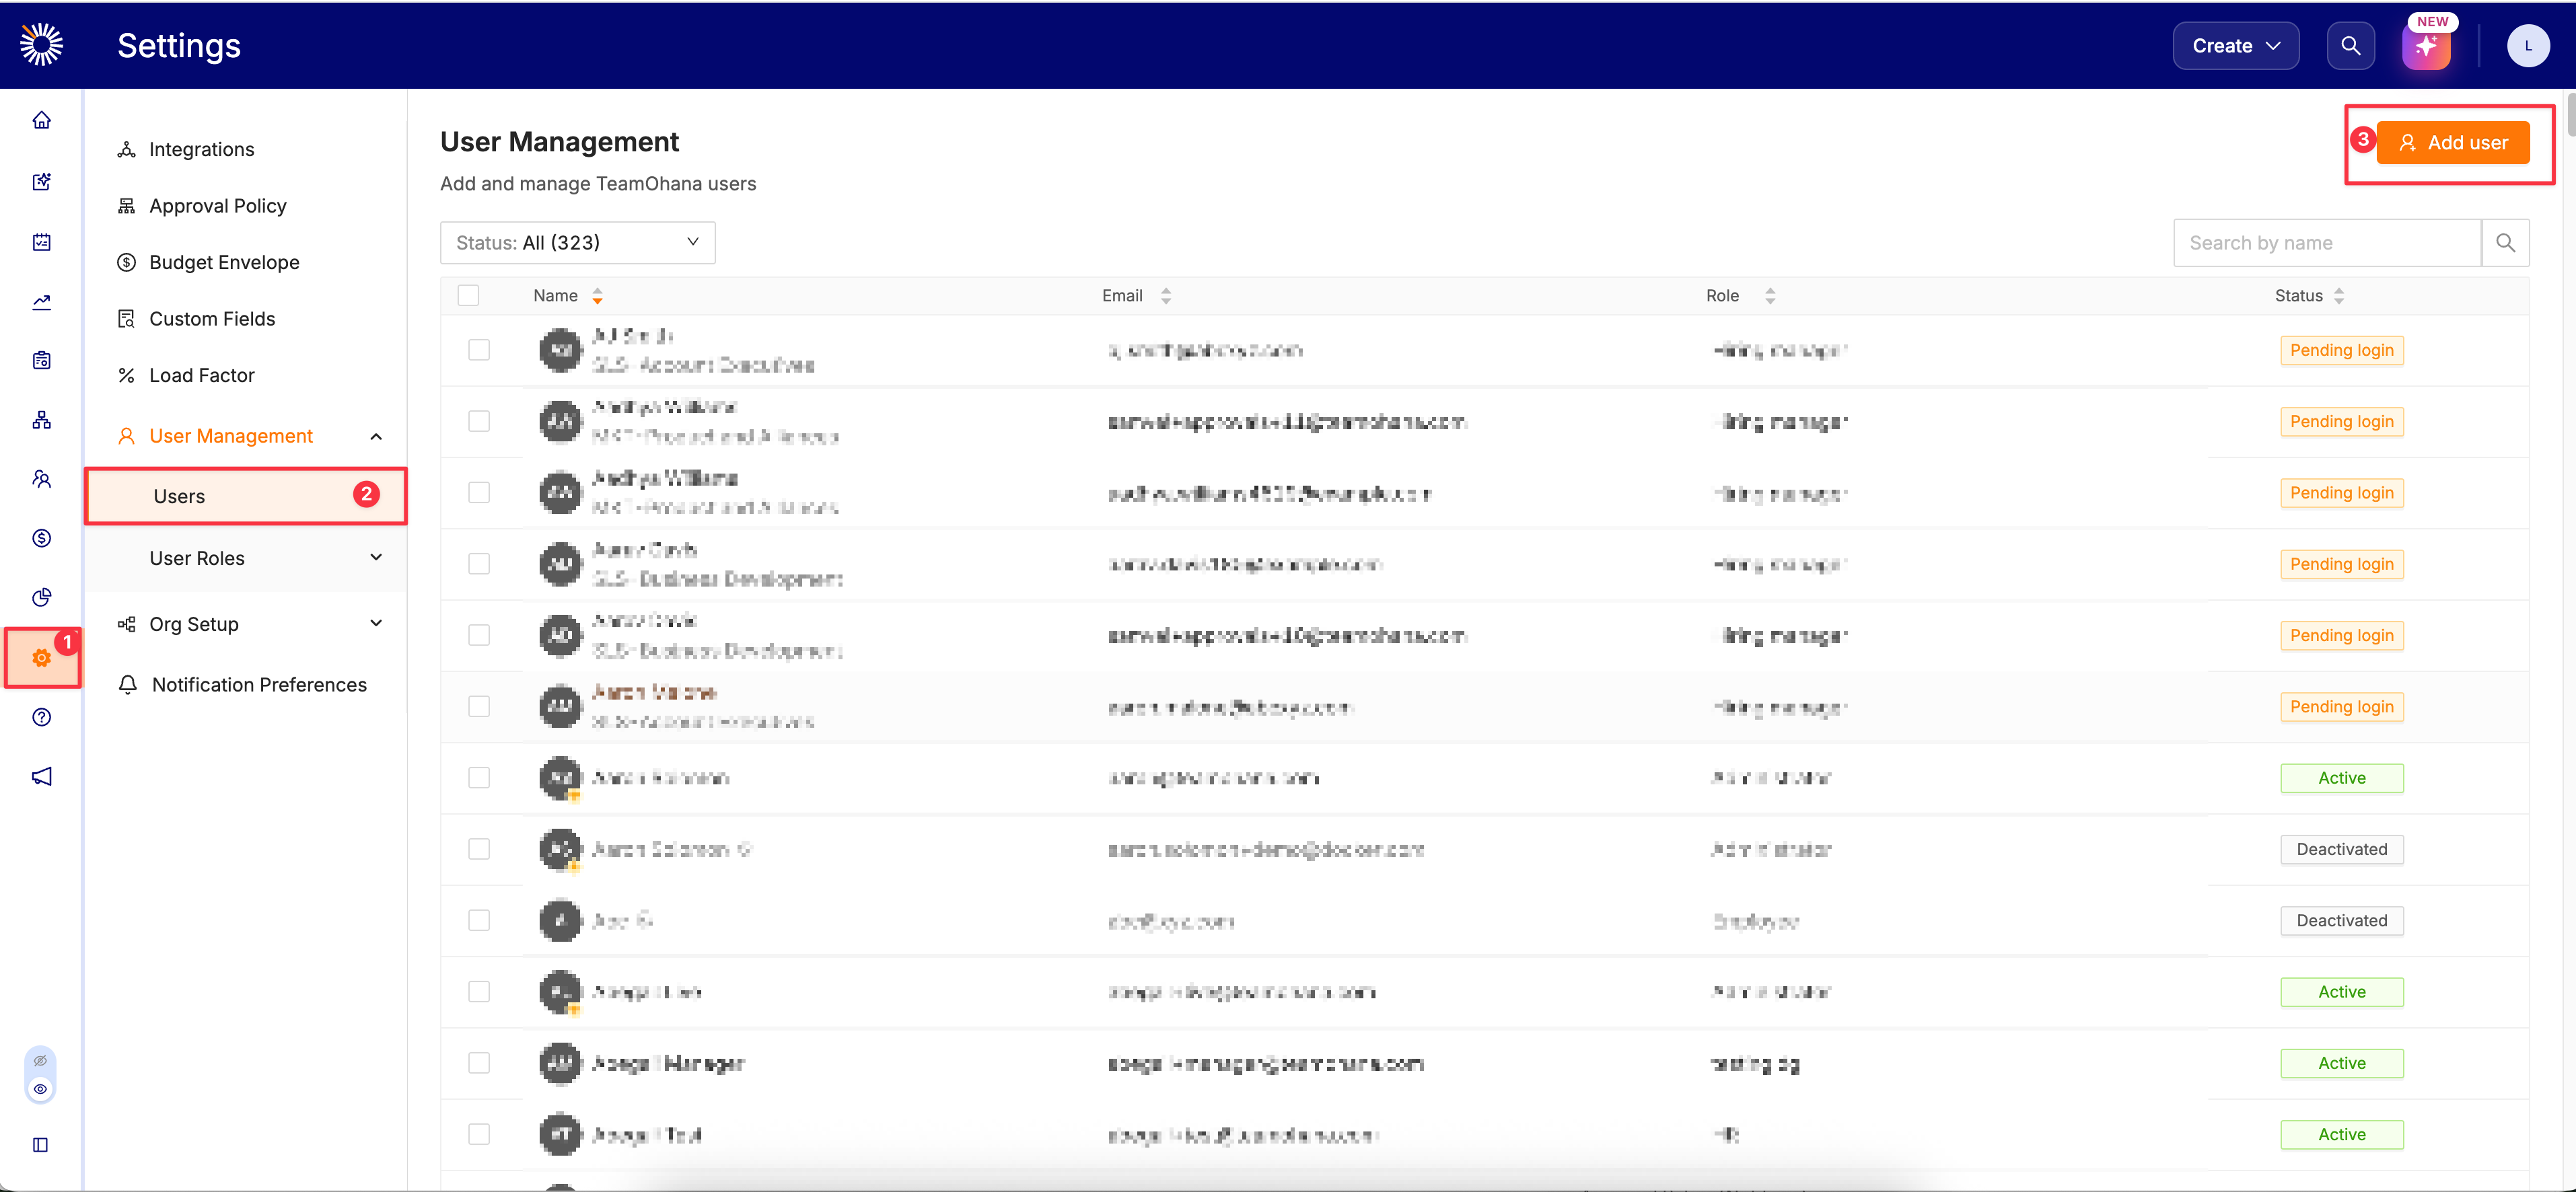
Go to Settings > Users, then click Add User in the top right.
2. Choose how to add the user
You have two options:
Enter an email address to invite someone directly. Use this for contractors, agency recruiters, or anyone not in your HRIS.
Click Add from HRIS to pick from your synced employee roster. This supports multi-select, so you can add a batch of users in one pass.
Adding from your HRIS pulls in the employee record, which keeps names and job details consistent with your source of truth.
3. Assign a role
Select a role before sending the invite. The role descriptions in the picker summarize what each one can do.
4. Set department and job level access
Open the user's profile and click Edit Profile, then select the divisions or departments this person should reach.
Department access controls what the user sees and has access to across the platform, including in the Hiring Plan, and Headcount Ledger. You can scope a user to:
A single department
An entire division and every department inside it
The full organization, which is usually reserved for Admin and Finance
Or a custom combination of Divisions or Departments.
Job category and level settings narrow this further. They determine which levels and job roles a person can request and view, subject to the rest of their permissions. Restricting levels is how you keep executive and other sensitive roles out of view for most of the organization.
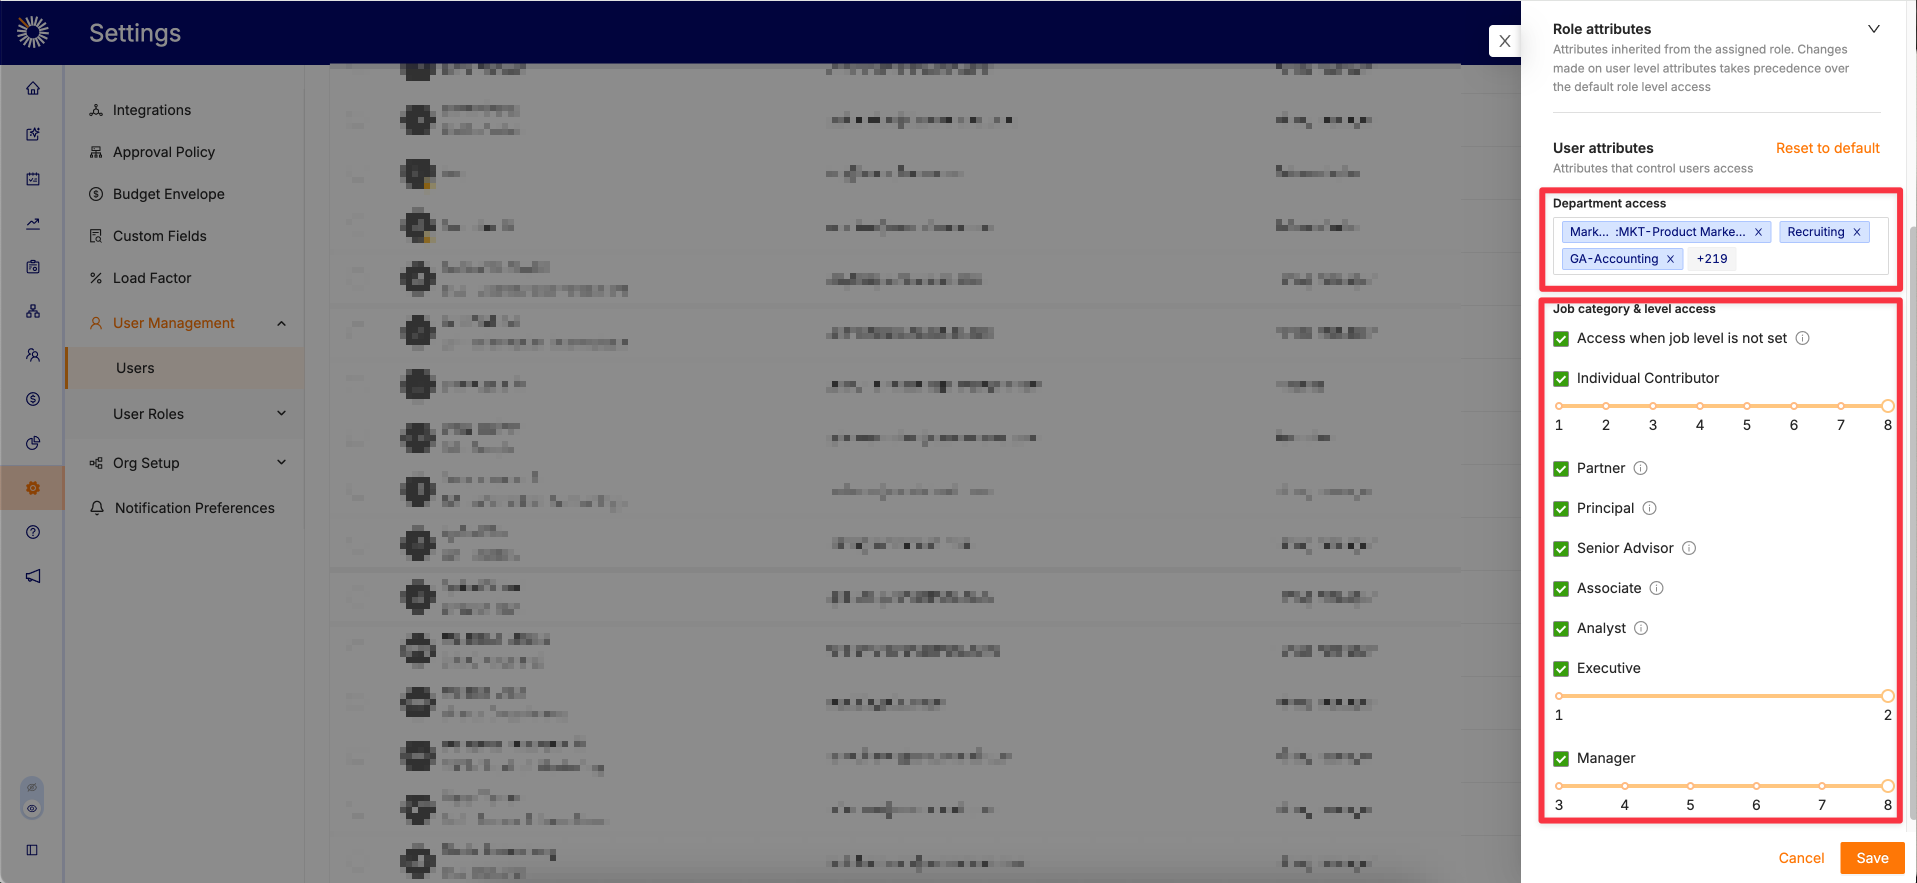
Important: If a user's reporting line crosses departments, add every one of those departments to their profile. Otherwise they will see only part of their downline, even with the Manage reporting line permission enabled.
5. Send the invite
Choose whether to send the email invitation automatically. Invited users get in through the email link or through SSO if your organization has it configured.
Managing existing users
From Settings > Users, a user with the Manage users permission can:
Edit a profile to change role, department access, job level access, or compensation visibility
Mute or unmute a user's notifications
Deactivate an account when someone leaves or changes jobs
Note: Deactivating a user in TeamOhana does not change their record in your HRIS. Your HRIS remains the source of truth for employee data.
Testing access before go-live
Before you open the platform to a new group, confirm each user type sees what it should. Check that department leaders see only their departments, that Finance has full organization visibility, and that recruiters see only the requisitions in their scope. Catching a scoping mistake before launch is much cheaper than explaining a compensation exposure afterward.