Approval Policies
Last updated: August 19, 2026
Approval workflows route budget-impacting headcount changes to the right reviewers before those changes take effect. New headcount requests, backfills, change requests, internal transfers, and terminations all pass through an approval chain you define. This article is for users with the Edit Approval Policy permission, which is enabled for Admins by default.
Three things change once approval policies are in place. Every budget owner, hiring manager, Finance user, and HR user sees the same process, so nobody has to ask who signs off on what. Requesters submit in TeamOhana instead of chasing stakeholders across email and Slack. And every decision writes to an audit trail, with notifications sent to approvers when action is needed.
Rules go into effect automatically for each new request submitted after the rule is saved.
Prerequisites
The Edit Approval Policy permission. Admins have it by default.
Note: During onboarding, the TeamOhana team helps set up your initial approval policies. Admins can add, edit, or disable them at any time afterward.
How rules are structured
Each approval rule answers four questions, and the Rule Builder walks through them in order:
Request type. Which kinds of requests the rule covers.
Conditions. Which requests within that type the rule applies to, based on attributes like department, level, location, employee type, and compensation.
Approval chain. Who approves, and in what order.
Notifiers. Who gets told what happened without being asked to approve.
Rule priority
Rules are evaluated in priority order. When a request matches more than one rule, the highest-priority rule governs and the others don't run. Order your rules so the most specific ones sit above the broader catch-alls, otherwise a general rule will absorb requests you meant to route somewhere else. To change priority, simply reorder by (dragging and dropping) the list directly in the platform for a specific request type.
Default approvers
A rule named Default approvers acts as the failsafe. If a request doesn't match any other rule, it goes to the default approvers. This rule covers all request types, so there's no scenario where a request has nowhere to go.
Building a rule
Go to Settings > Approval Policy and click + Add rule. Name the rule, then work through the four steps.
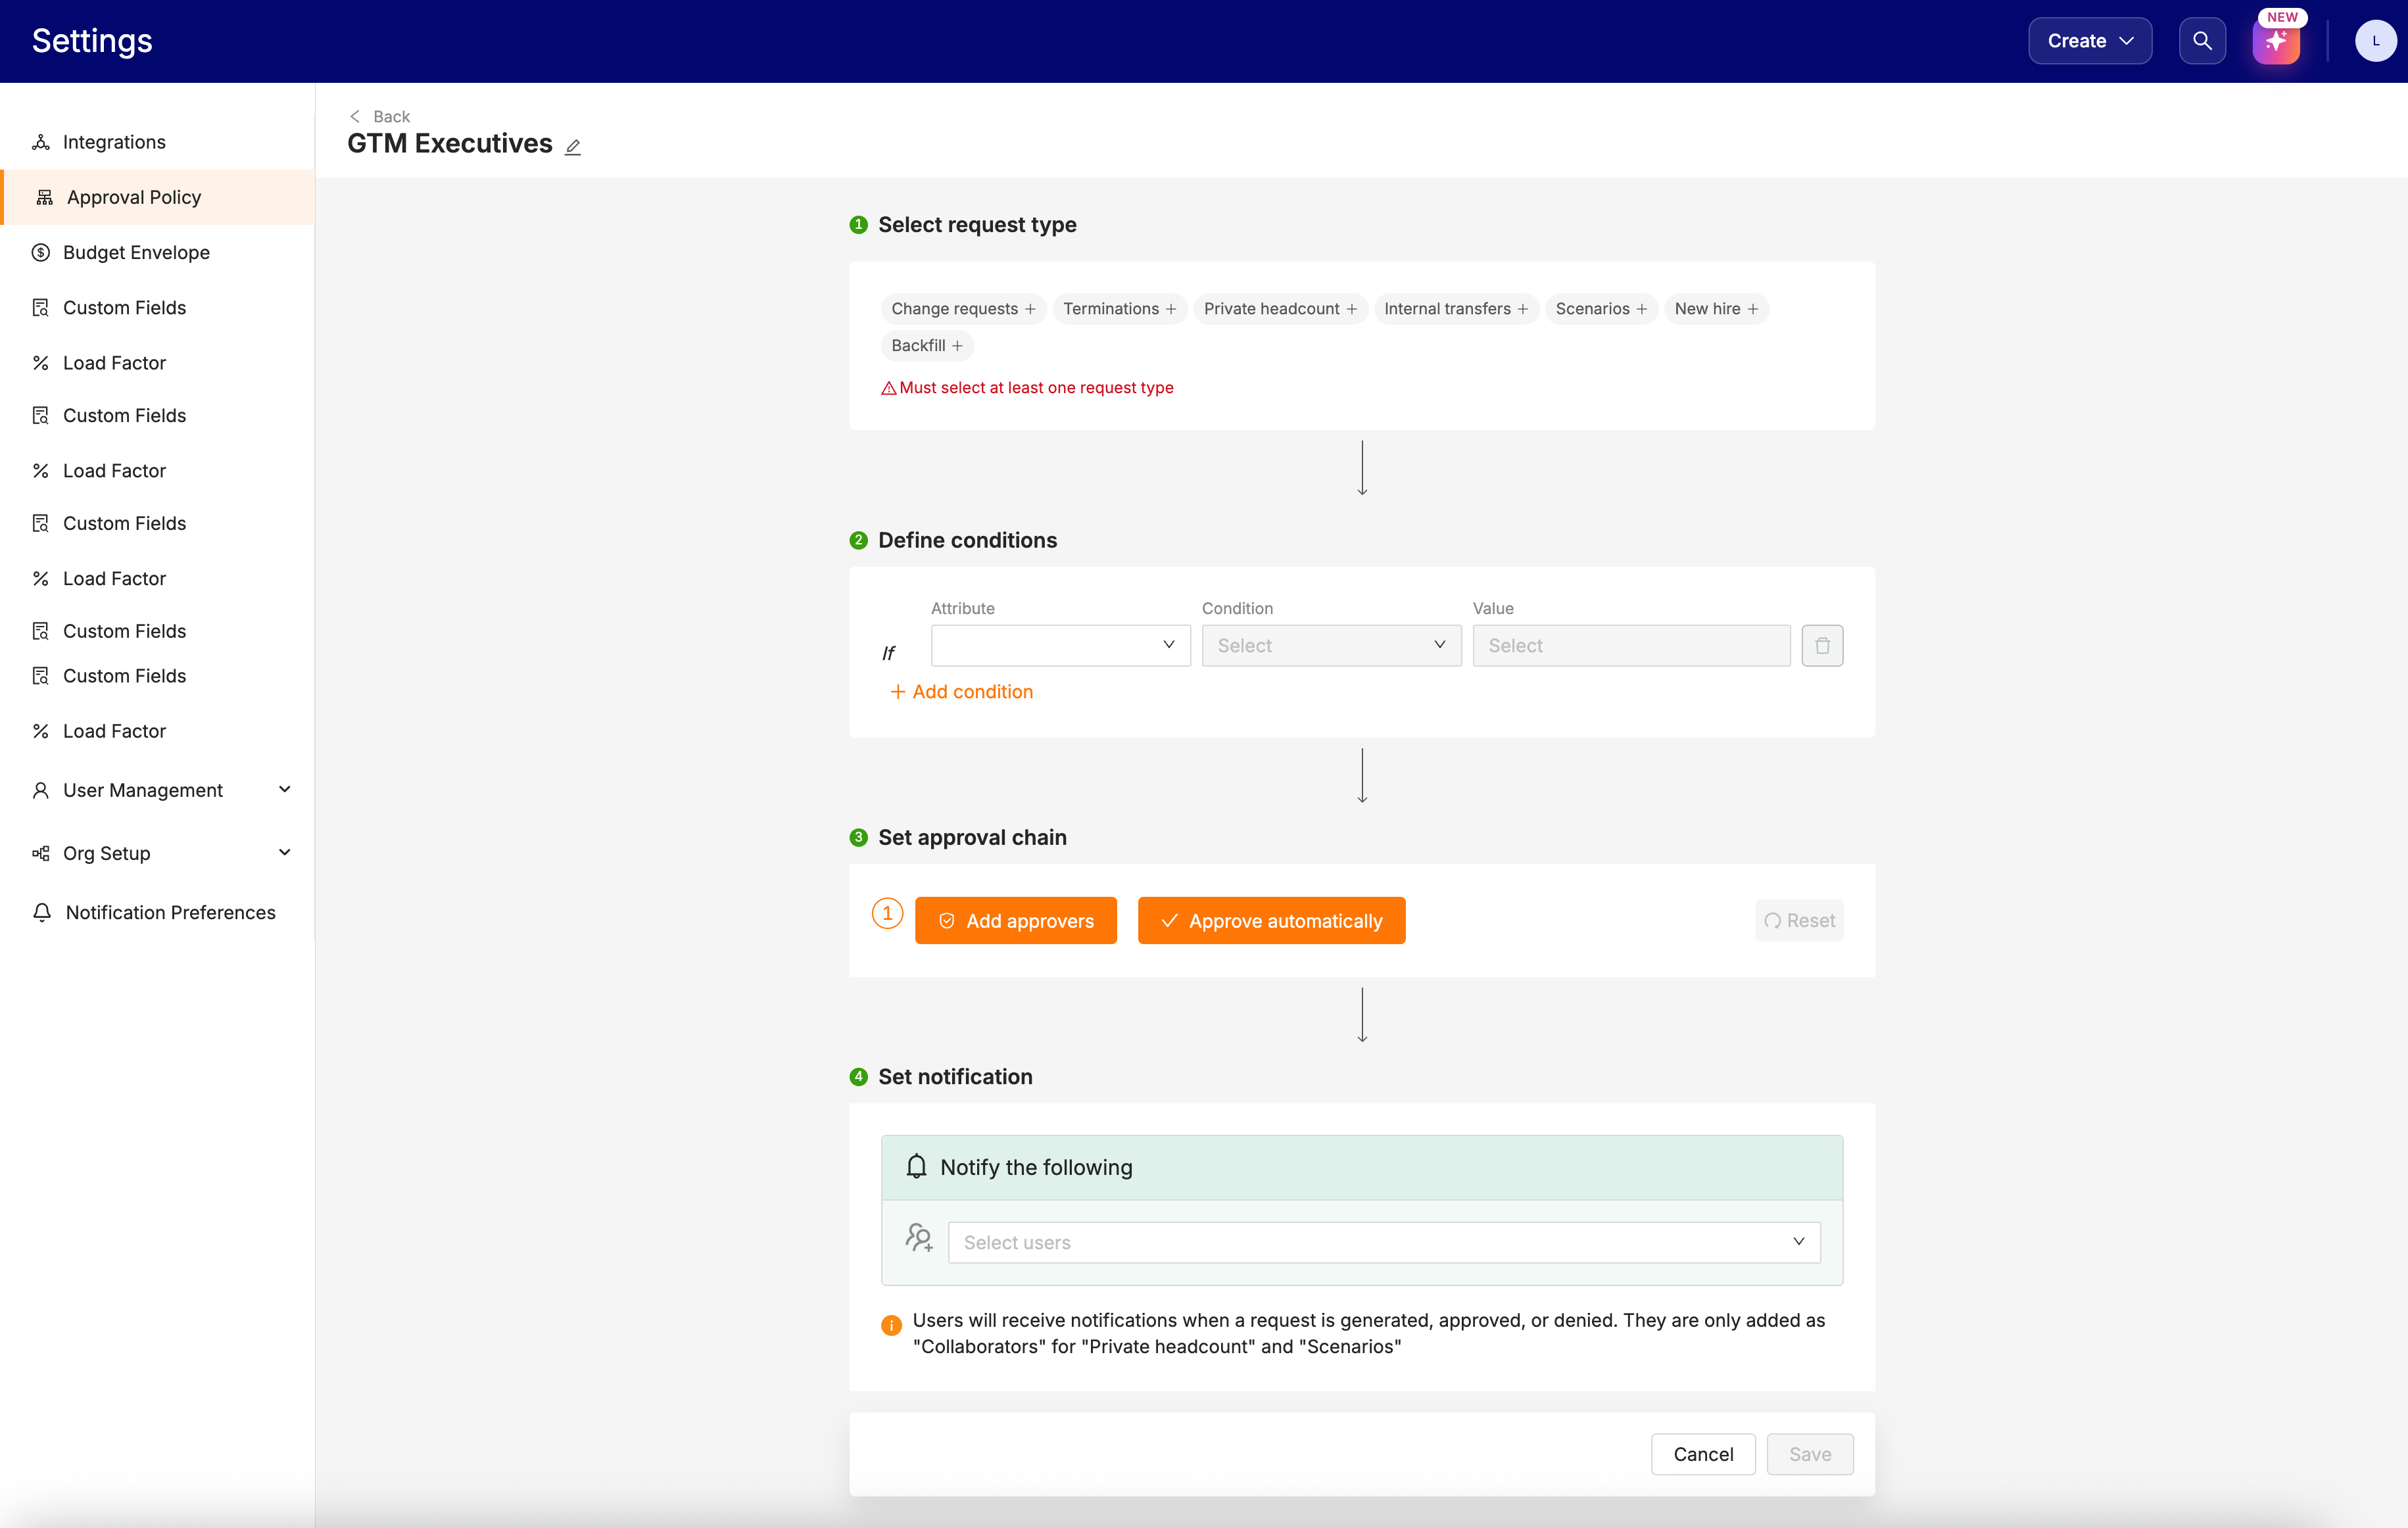
Step 1: Request type
Select the request types the rule applies to. You can select more than one. The available types are new requests, backfills, change requests, internal transfers, and terminations.
Some conditions in Step 2 are specific to certain request types. If you build a rule that spans several types, a type-specific condition only evaluates against the requests it was designed for and is ignored for the rest.
Step 2: Conditions
Conditions decide which requests inside the selected types the rule catches. You can route on organizational attributes, on compensation, or on both.
Organizational attributes include division, department, job level, location, and employee type.
When you select an entire division, TeamOhana keeps that selection current on its own. New departments added under the division are picked up automatically, and archived or deleted departments drop out. A background process handles the sync, so a rule scoped to a division doesn't go stale when your org chart changes. Selecting individual departments instead gives you a fixed list that you maintain yourself.
Tip: If a rule is meant to cover a whole division permanently, select the division rather than checking off its departments one by one. That's the difference between a rule that keeps up with reorgs and one you have to remember to revisit.
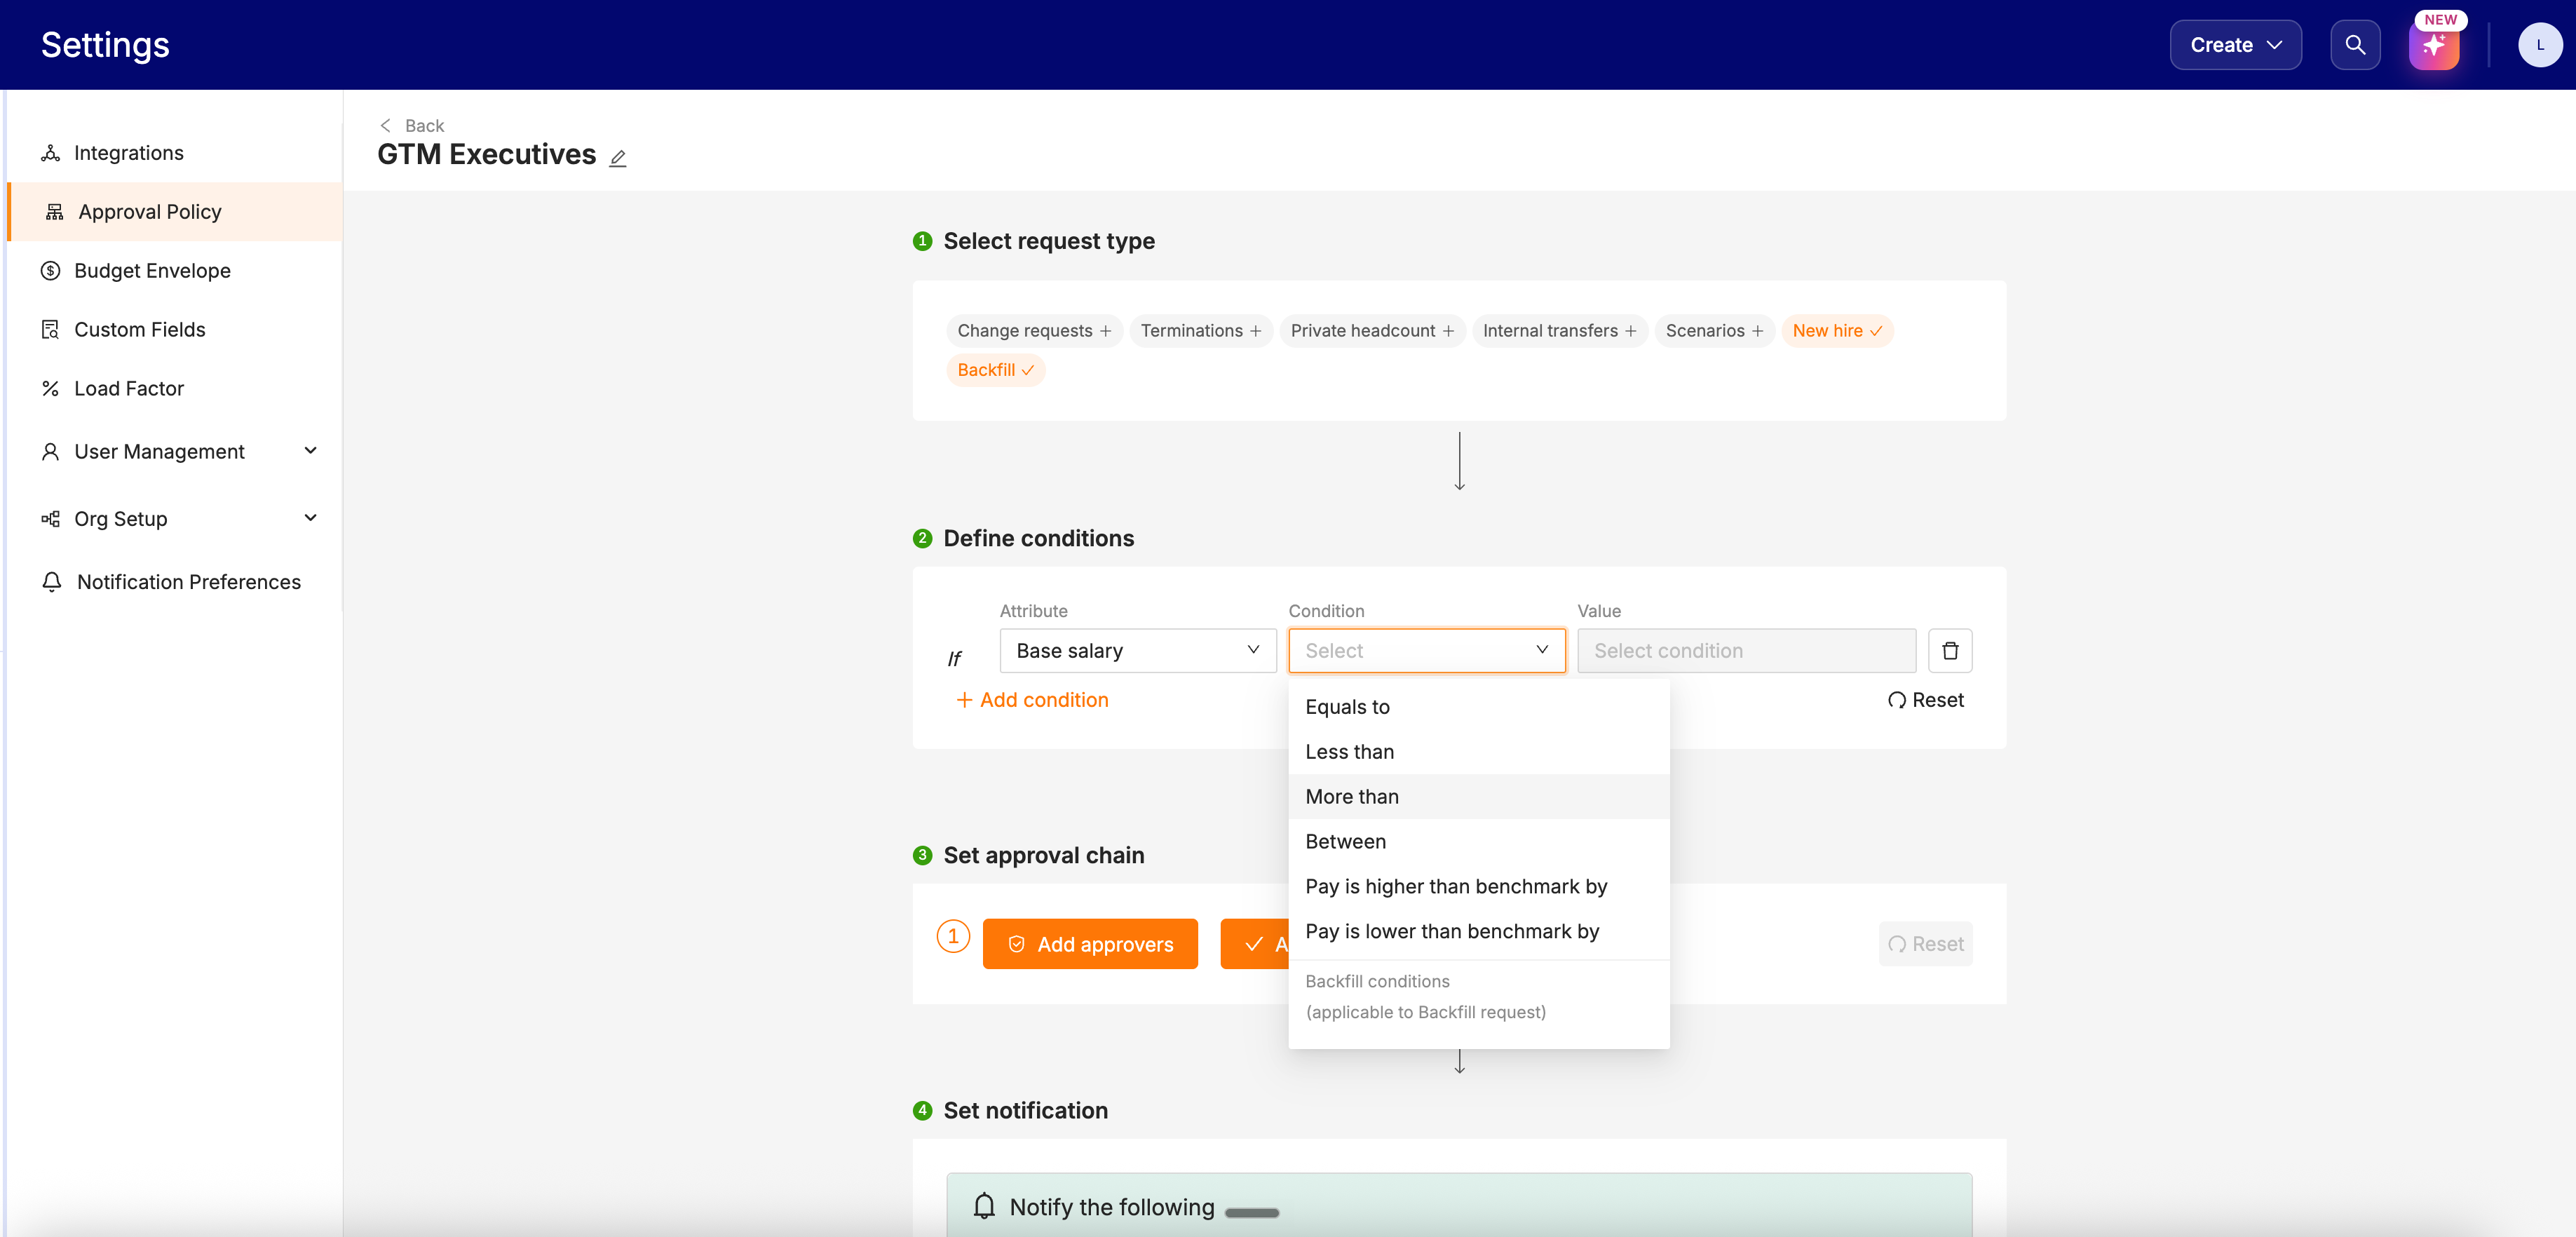
Compensation conditions let you route on cost impact instead of org structure alone. Two are available: Base Salary and Compensation (total comp). Both support these operators:
Equals to
Less than
More than
Between
Pay is higher than benchmark by %
Pay is lower than benchmark by %
Backfill requests add two more:
Pay is higher by % than backfilled employee's pay
Pay is lower by % than backfilled employee's pay
Important: Benchmark conditions read job band data. If a headcount is missing job band data, the benchmark condition won't run for it, and the rule won't match on that basis. Check your job catalog coverage before you build routing that depends on benchmarks.
Compensation conditions are supported on new hire, backfill, private headcount, and change requests. The two backfill comparisons above apply only to backfill requests, even inside a rule that covers several request types.
Step 3: Approval chain
Add the approvers and set their order. Approval is sequential, so each approver sees the request once the one before them has acted.
If the requester is the first person in the chain, they're skipped. If they sit second, third, or fourth, they still have to approve.
Step 4: Notifiers
Notifiers are FYI-only recipients. They get email and Slack notifications on three events, Request Created, Request Approved, and Request Denied, and they're added as collaborators on the record so they can open it directly. They can't approve or block anything.
Search for users in the Notify the following stakeholders field and select them. A user can't be both a Notifier and an Approver on the same rule.
Notifiers are optional on standard rules. They matter a lot more on auto-approval rules, where they're your only line of sight into what got approved.
Click Save to create the rule.
Auto-approval
Some requests don't need a person in the loop. A backfill at the same salary, a lateral transfer with no comp change, anything routine that your team approves every time without discussion.
Auto-approval rules move matching requests from Draft straight to Approved, skipping the In Approval state entirely. Standard approval notifications are suppressed, since nobody was asked to review. The requester gets an "Approved" notification and the rule's Notifiers are alerted. Every auto-approved request carries auto-approved: true in its activity log, so you can filter for them later and confirm the rules are behaving.
Auto-approval covers new headcount, backfills, change requests, internal transfers, and terminations. Setup and use cases are covered in full in Auto-Approval Workflows.
Managing existing rules
Editing a rule
You can update a rule's name, its conditions, its approvers, and its notifiers at any time.
Changes don't apply retroactively. If you edit the approval chain while a headcount is mid-flow, that headcount finishes under the chain it started with. The same goes for new auto-approval rules, which never pull requests out of an approval queue they've already entered.
Searching
Use the search bar on the Approval Policy page to filter by user name or department name. This is the fastest way to find every rule a departing employee appears in.
Cloning
Click the three dots to the right of the approvers on the Approval Policy page and select Clone. Notifier assignments carry over to the copy along with everything else.
Disabling and re-enabling
Disabling a rule archives it. Requests that the rule used to catch will fall through to the next matching rule, or to the default approvers if there isn't one. Re-enable a disabled rule from the same three-dot menu.
Deactivated users in a rule
When an approver is deactivated, Admins get a notification prompting them to update the rule, and the user's avatar on the Approval Policy page shows a deactivated indicator. The indicator appears on the rule detail page too.
Until you remove them, requests covered by that rule skip the deactivated approver. The workflow keeps moving, but that approval step effectively isn't happening.
What users see during approval
Requesters see the approval chain on the request before they submit it.
Once a request is in flight, the avatar of the approver currently reviewing it is circled in orange. Approvers who have already acted are circled in green. That gives the requester a read on where the request sits without having to ask.
Screenshot: a request in approval showing the orange current-approver circle and green completed circles
Suggested approval chains
If you're setting up policies for the first time, these chains are a reasonable starting point:
Net new headcount requests: department leader, Head of Talent, Finance
Change requests: Head of Talent, Finance
Internal transfers: Finance
Terminations: department leader, HR or HRBP, Finance
Adjust from there. Teams with high backfill volume often add an auto-approval rule for in-budget backfills so the chain above only runs on net new spend.